For some reason, I've been getting mentally ready to install new marker lights. I would have made an effort to save the ones that came with the trailer, but they were not originals and were pretty beat up. The new marker lights are available locally, but I got these with a big order from Vintage Trailer Supply. I was so excited to be adding some color to the side of the trailer and be doing something other than polishing, that I decided to make a step-by-step description of the process. So I can live the moment over and over again :)
Begin with the marker light base. These are aluminum so I can polish them someday. Lucky me!

Step 1: Drill a new hole in the side of your trailer. The base plate of the light has the same screw hole pattern as the original. The wire, however, passes through a different part of the base plate than the original.

Step 2: Spread a thick bead of Vulkem on the base plate. Enough to make sure it squishes out the sides when you tighten the screws.

Step 3: Get your original aluminum screws ready to go. These were polished before the Vulkem was spread.

Step 4: Line up the screw holes and tighten them down till their snug and press the base plate evenly so extra Vulkem squishes out the sides.

Step 5: Soak a clean cotton rag in paint thinner and wash the extra Vulkem away.

Step 6: Attach the cover plate and admire.
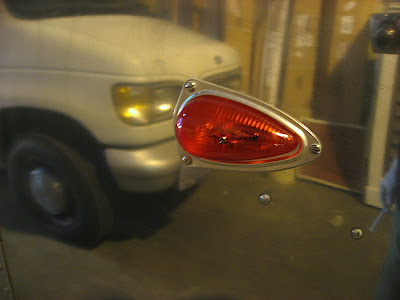
Step 7: Repeat three more times (or more depending on your vintage) with the other markers. Have fun!
Next to install was the oven vent cover. I really like this cover. On the 18 footer, the oven vented through some small holes drilled in the counter top. It was never a problem when we used the stove, but I like this one a bit more. It vents the burnt propane to the outside. But mostly, I just like the way it looks. It is Vulkemed like the marker lights. I also added a new fiberglass bug screen behind it.

After that was the plumbing vent cover. I set this one in a heaping pile of Vulkem. When we brought the trailer home, I discovered it had been the source of a major leak. The screws had backed out and water was just helping itself inside. Not any more. Once I place a vent pipe in the cover plate ( 1 1/4" ABS pipe) it'll get sealed with more glue.

From over the top of the trailer, you can see the refer vent and furnace vent mounted and ready to shed water. They got some TLC while off the trailer during polishing. I mounted them with butyl tape and original screws. After the excess butyl tape is trimmed, I will supplement with a bead of Vulkem on the perimeter.

On went the tail lights. Bedded in a layer of Vulkem, of course. While they were off, I cleaned corrosion from the bulb housing. Then I installed new wiring innards & light bulbs, picked up from the local auto parts store.

Last for the screw on fixtures was the license plate light. It is in really good shape, except for the rubber trim ring. The cracking in the rubber is only noticeable when you get right up to it. It got new electrical innards, too.
Last project for the weekend was to work on the door. I spent some time scraping old weatherstripping off and using a chemical stripper to remove most of the adhesive. After getting that clean enough, I cut and set some new weatherstripping in the screen door part of the door-within-a-door. There is more to do on the door, for now I'm just happy is is opening and closing well.
After brushing off a thick layer of corrosion, the threshold was polished and installed with a thick layer of Vulkem and new stainless steel screws. I found slotted screws that had a pretty low profile head on them. My senior blind rivet technician (Emmett) helped get the face of the threshold set in place.

What a great day & a half to get the trailer looking like a trailer again. I hope to get the rest of the door projects done, exterior outlet installed and sealed up, Fantastic Fans & Astrodome all done this week. Then when the weekend rolls around, I can do the interior rough in wiring and insulation. Soon, we'll be riveting interior skin!


feels like a brand new day... I know exactly what you are feeling.
ReplyDeleteIt is looking so good. And we'll all be really glad when its done!
ReplyDeleteYou guys are making great progress. Won't the fiberglas screen behind the stove vent get so hot it will melt? I used a metal screen without any problems.
ReplyDeleteKeep at it.
Brad
... am green with envy. You've made SO much progress while I've done so little. Congrats on such a great resto, I'll catch up eventually ! Enjoy your summer in alooominum. I think we'll still be under canvas.
ReplyDeleteChris
Did you make a gasket for the marker light lens? I seem to be getting lots of moisture inside my lenses and I made a gasket but it does not seem to help.
ReplyDeleteI think your fans are hurting for an update. How about some pics of the finished product.
ReplyDelete