
After so much repetition on previous projects, I for one was ready for some variety. Great attitude to have for the weekend, since there was so much to learn and do. Able helper, Starbucks at my beckon and no rain. What could be better?
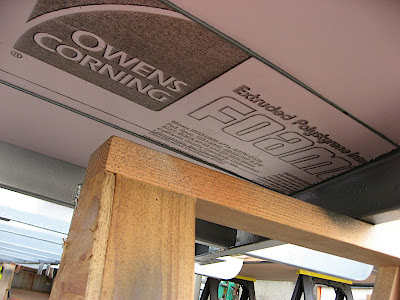
The first project was to get some rigid insulation cut and mounted just below the sub floor and above where the spare tire is to ride. We laid the insulation on top of the frame and used a marking pen to trace our cuts. Keeping the insulation snug, it will stay in place until we cut and screw a piece of aluminum to the bottom.
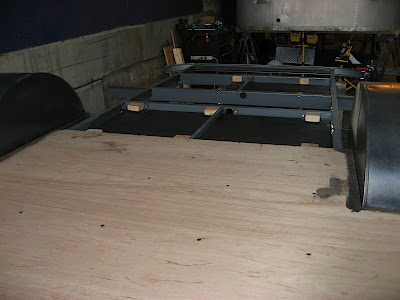
I also decided to give a vapor barrier between the steel frame and plywood sub floor. I bought some foam meant to go under a sill plate and above a concrete foundation wall. It was 5 1/2" wide, so we cut widths that worked better for the frame. Tracing the pattern of the frame on the bottom of the ply, we stapled the insulation in place while placing the sheets in place.

Once the sheet was centered and all the sheets fit well back to the wheel wells, it was time to drill and screw the plywood to frame. We used a 1/4" self tapping deck screw. It is a four part drilling process: pilot drill, countersink taper, drill to size and drive the screw. Worth it, because they feel really solid when in place. We used the same amount of screws that Airstream used to bolt it down originally. I bought 100 screws and I think I'll need more before were through.
To keep the sheets solid on the joints, we decided to biscuit join and glue.

My expert biscuit technician was up for the job.

First sheet was slow because of the spare tire and setup time. Second sheet was slow because of the step and aluminum that protects the underside of the plywood there.

Slow, but exciting. To be working on projects that don't involve mouse turds and mildew in the air. Or wearing a respirator because of paint fumes. Getting to take breaks to have tickle battles with Emmett.
Third sheet was plenty slow since it was time to reintroduce the fenders to the frame. I had spent the time to clean them up and spray them with POR 15.

Next is to cut new insulation and get them measured into place. Once that is done, the third sheet can get glued in and bolted down.


Showing progress....

Katie came down with the big boss, Leon. Boss said it's time for lunch.

The last two sheets were fitted by myself and Norm with the fenders bolted temporarily in place. We moved the sheets in and out of position and trimmed the plywood until the sheets fit well. Setting them aside, it is time to fabricate the mounts for the holding tanks.
We have two waste tanks in this trailer. The black tank is 18 gallons and the gray tank is 32 gallons. I decided to use steel straps bolted the frame members to hold it in place. The frame was prepped to hold the tanks fairly closely, so I need to keep them from falling to the ground. The black tank is to get two 1/8" x 1 1/4" straps and the gray tank will get three.
I'm not much of a smithy. A torch and hammer is about all I know about bending steel. Worked out well enough this time. First, I cut the straps to equal length for each tank and marked them for the width of the tank.

Next, I clamped them to a block of wood and heated them up.

Then I beat on them with a hammer (my favorite part) to get them just so.

Not looking too bad...

Used the floor jack and some bungee cords to hold the tanks in place to mark the brackets and get them drilled and bolted in place.

This part took some real hours. Fun to see it all coming together finally.

Nice and tight to the belly. Both hang below the frame by about 4" at most. Should have about 12" from the ground to the bottom of the tanks. Maybe 10" at the low part of the drain pipe.


That was all I could handle for one weekend. Found a whole array of muscles I don't normally use. Not to mention sore shins and knees from leaning against the frame.

Next up is to drill holes in the tanks for vents and inlets. Also need to settle on getting the black tank vented and shower pan drained into the gray tank. Fun!


No comments:
Post a Comment